

REQUIRED PRIOR KNOWLEDGE: You should already be comfortable importing your OC Products Sheet. Read this to find out how.
REQUIRED TOOLS: Your Official Configuration sheet should already have a tab called something like “Batch Price Updater“. If you do not see it, ask your PM. We are progressively rolling this out to all OC Sheets from 1st March 2024.
WHAT THIS IS FOR: For clients with large product lists with frequent promo campaigns where the listed price is changed (instead of effected via a discount Coupon). Now you can use this sheet and batch-update prices for a whole range of products for your campaign. And after the campaign, use the same sheet to REVERT to the original pre-promo prices.
How to use the Batch Price Updater Tab

this is the key-field in the product database. We recommend you link this to the “model” in your original product configuration sheet.
also link to to the original product config sheet. This is really just for your convenience as you fill out the information for this product (since some “model” codes are cryptic)
this is only used if the product is a collage (has more than one photo). write the number of photos here, else always make sure its “1”
Read the price formula tutorial to understand how these affect how the price is displayed
We recommend you link this to your original OC Sheet’s price. Or you write it in here. This is your “MSRP” or the regular non-discounted headline price. When you imported the “reverted” price, this is the number that will be imported.
This is the usual extraCostPerPage property which is used in photobooks and photobox bundles (where you have a basePrice and extraCostPerPage thereafter). This is the incremental amount charged after the initial base charge (for a book of 20/24 pages) or for a box of photos beyond the initial 30 or so prints.
This is your discounted new price that you want to change to
This allows you to reduce the incremental price during your promo campaign. Most campaigns do not change this price, only the base price.
During import, this is mapped to the “price” property
At the end of the promo campaign, you will reimport this same sheet, but map this attribute instead to the “prices” property
this causes this product to be only available in the staging app (so it will NOT show up in the live app) Remember to set to “prod” when you are ready to go live with your campaign! (or when you revert to original prices)
Now import your new prices...
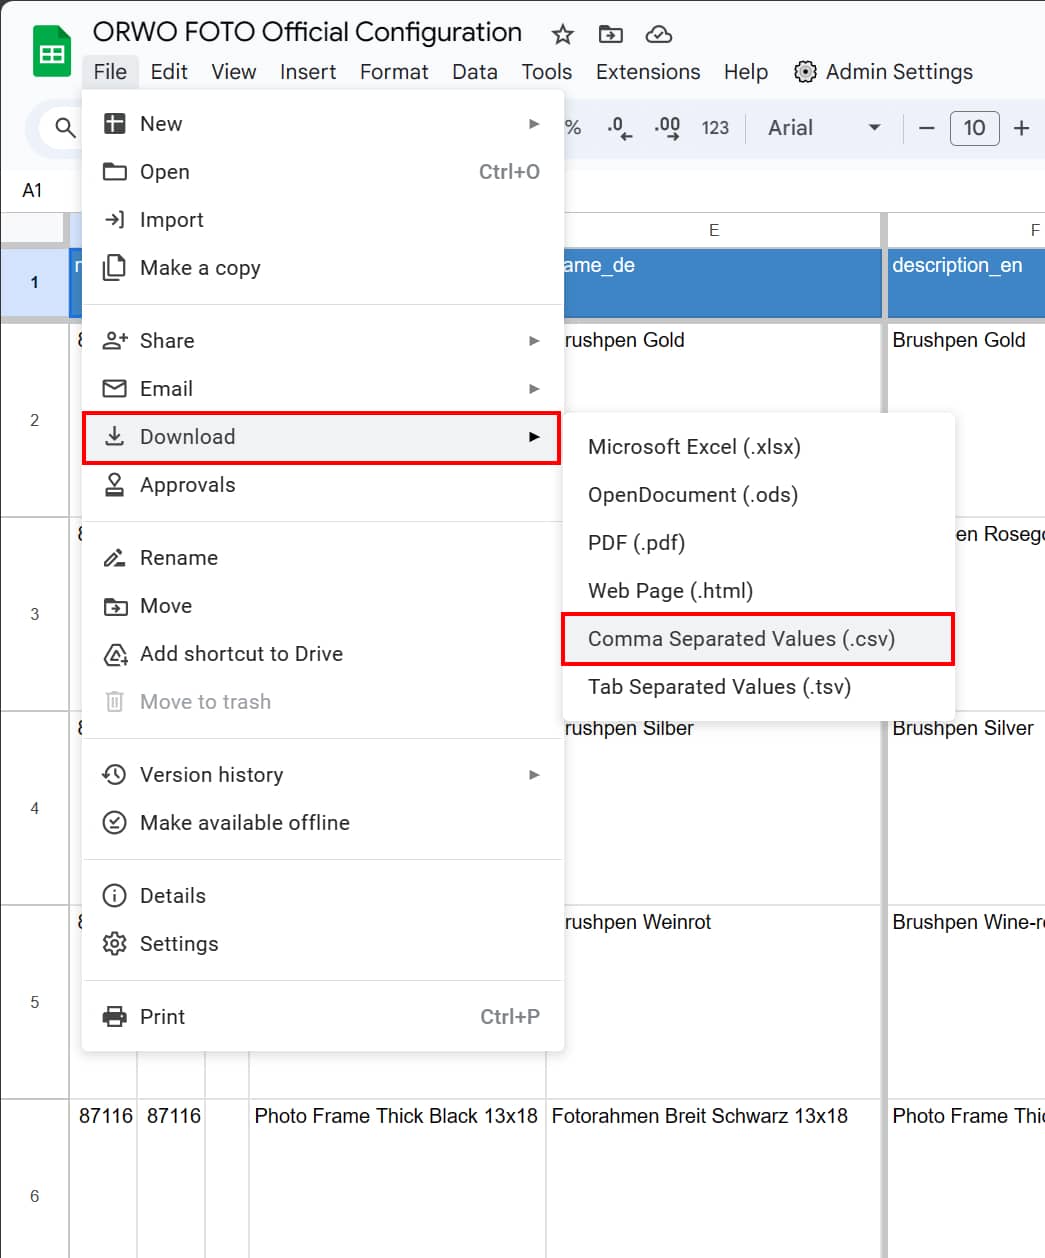
Step 1: Download CSV
Download your Price Updater sheet from Google Sheets:
Menu >Download > Comma Separated Values
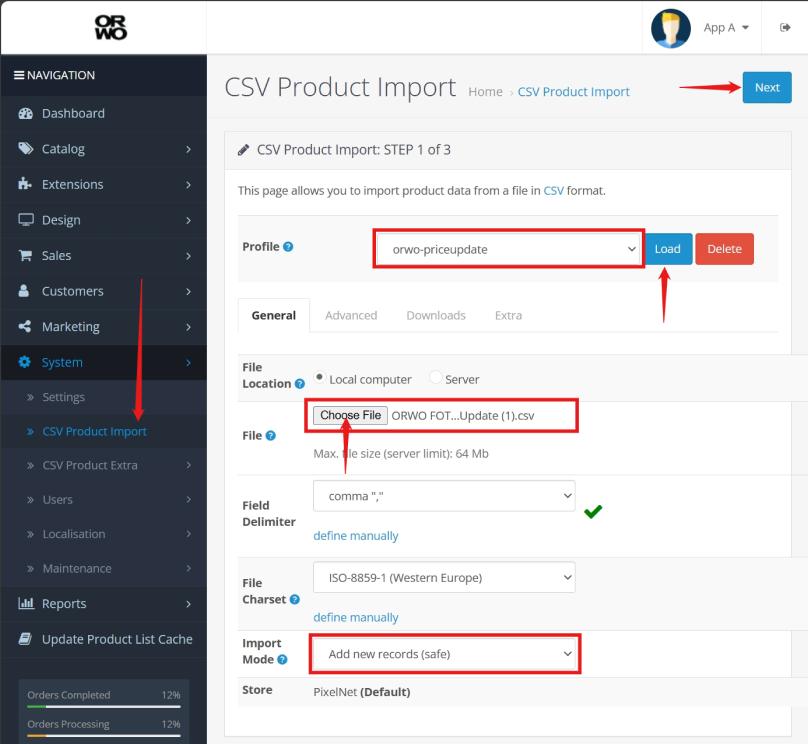
Step 2: Prepare Dashboard to understand your CSV
Login to your OC Dashboard and go to:
System >CSV Product Import
Load the right profile:
To import new promo prices, choose: _priceupdate
To revert to pre-promo prices, choose: _pricerevert
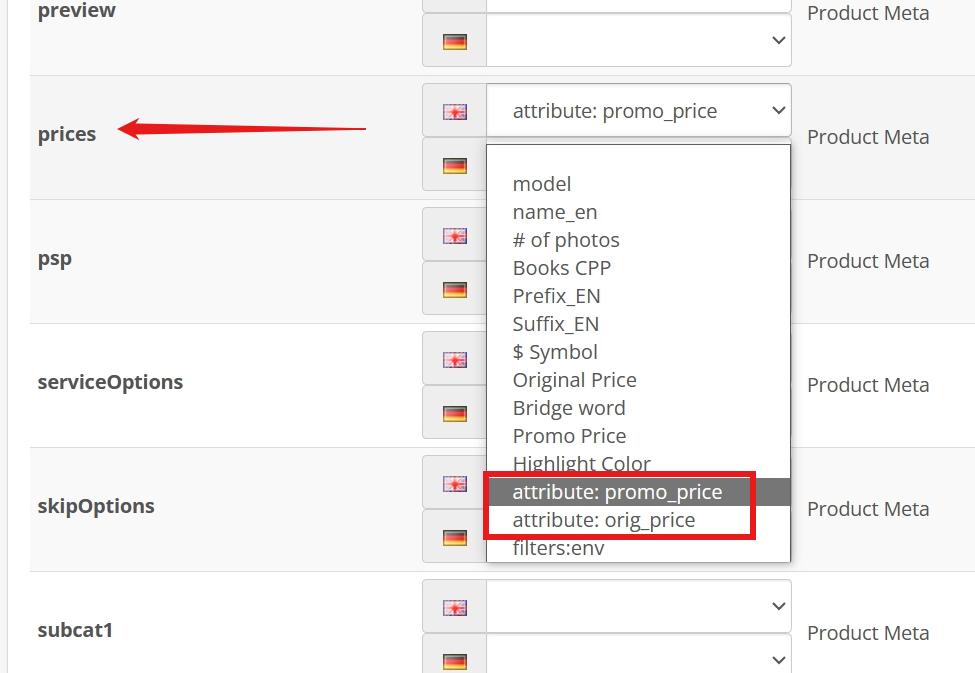
The key difference is that we map prices to either attribute:promoprice or attribute:orig_price
IMPT: the Import Mode should be “Add new records (safe)” (this is different from when you import entire OC Product Sheets with over 50 columns…)
Make sure you choose the right Store (“Markets”) then click Next (top right)
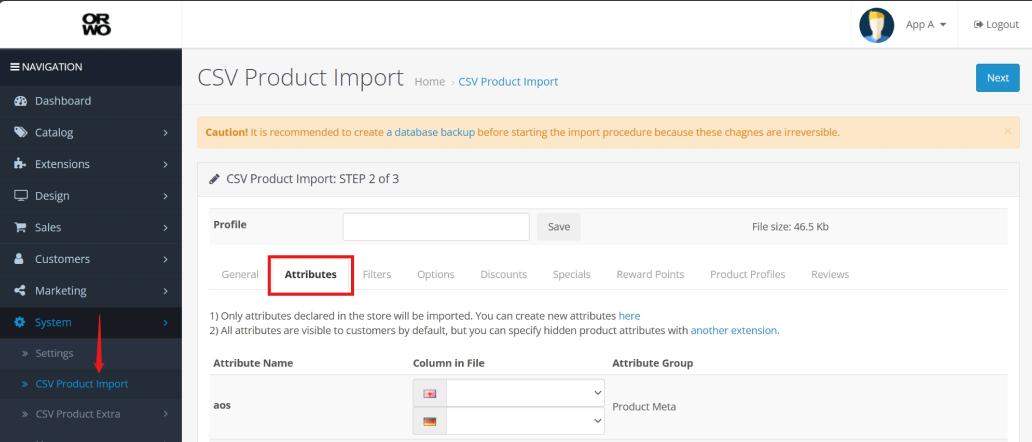
Step 3: Click Next
99.99% of the time you would ignore this screen and just click NEXT (top right)
But this is where the headers in your files are mapped to the actual attributes that matter in your product database.
PMs: make sure that the profile has mapped “prices” to “attribute:promoprice” or “attribute:orig_price” accordingly.
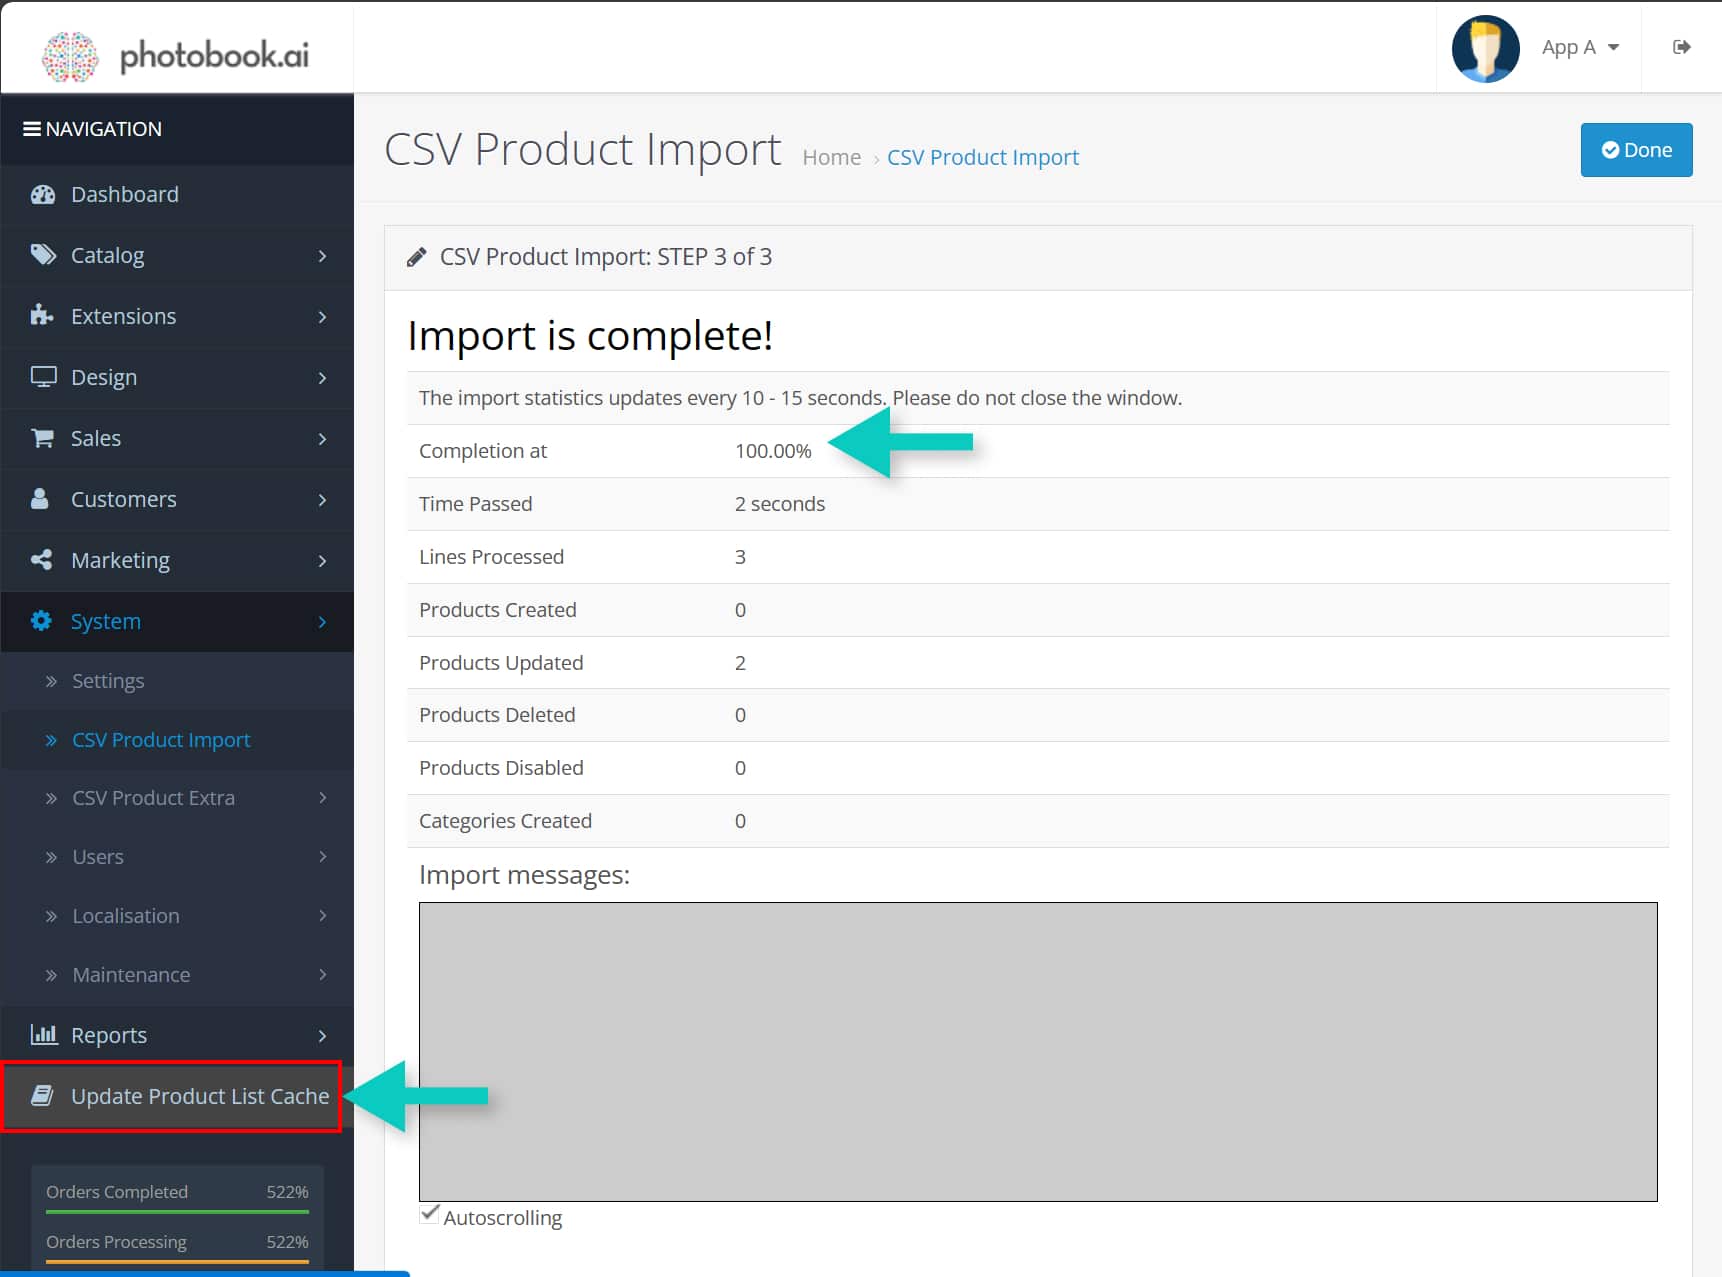
Step 4: Update Cache
Once you hit 100% there is one final step: Click
Update Product List Cache
This generates new product JSON files which are the payloads that gets downloaded to your app upon launch.
We run this automatically every hour. But if you are eager to see the changes you imported instantly in your app, you need to force the refresh. (make sure to force dismiss your app and launch it to force it to re-download latest offerings)
! BE AWARE – As you are changing the price attribute, after successful import, make sure you run the app right through to adding it to cart and making a test payment for a couple of products.
We recommend you always import into DEV first, check, then import to PROD.