

Putting in a Test Order
Your white-label App always comes in a pair for both Android and iOS: the Production and the Staging App.
For Android, you will have two builds every Friday: one of them will have a “-staging” suffix.
For iOS, the App released via Firebase App Distributor is the “staging” app, whilst the one via TestFlight is the Production app.
However, to maintain production integrity, there is always only one back-end Dashboard OC and one GPS (Global Print System). To test out new products when your apps are already live, you will make use of filters in your Dashboard. (see this tutorial on How to set up Staging Products without affecting users of your live apps which are already out in the wild.)
Putting a Test Order before Apps are Live
Very often before the apps go live, we will want to go through several rounds of testing actual real orders and have them printed by your PSP. To do this, you can put in test orders both on the Staging and Production releases, as the apps are not yet live. (see below for dummy test credit card)
Putting in a Test Order after Apps are Live and back-end is in “Production” mode
Once your app is Live, the back-end system will be switched on to Prod mode.
This means that any Orders you put in through the Production App will go to the Production
environment, and your PSP will actually print and fulfill this order, unless you Cancel the order via your Dashboard. (How to cancel an Order)
Orders put in through the Staging App will never be sent to the PSP, but will appear in your Dashboard Orders list.

Dummy Test Credentials
Stripe:
Credit Card: 4111 1111 1111 1111 Expiry: any future date CVV: 111
Klarna: (coming…)
Braintree-Paypal: (coming…)
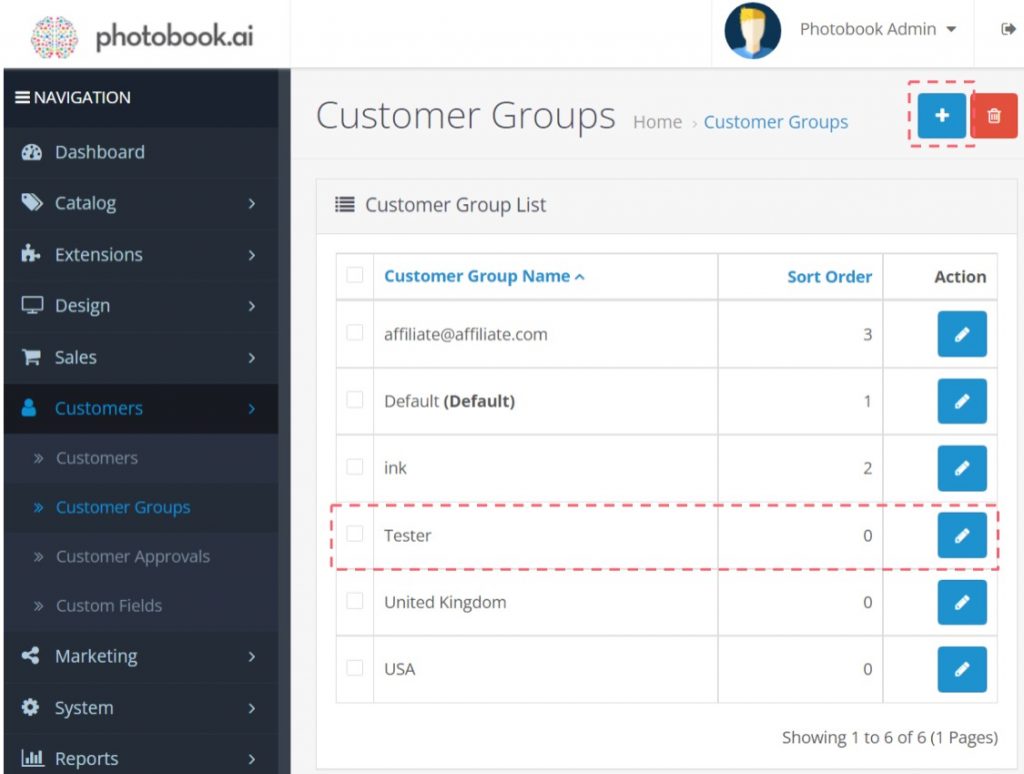
Creating a Tester Customer Group
Customers > Customer Groups
You should have a prepopulated list of a few different Customer Groups.
You will find one called “Tester”. If not, simply click the blue + icon on the top-right and add it yourself.
Now click the blue Edit icon on the right of the “Tester” group.
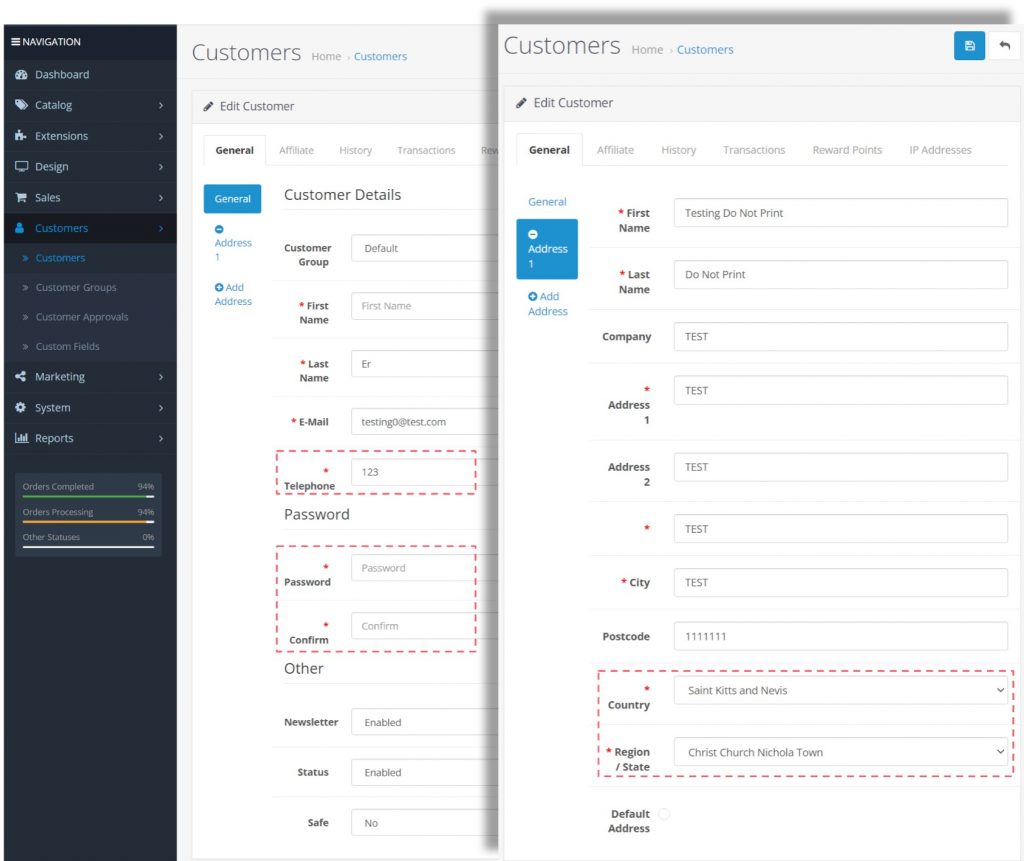
Now that your customer group is setup, go to Customers, and find the emails of all the Testers in your team who will be putting in Test Orders.
Click “Edit” customer record and you will see the screen on the left.
Usually, the few red-boxed items would have been prepopulated during account creation with illegal datatypes.
- Set the Customer Group drop down to “Tester“.
- Telephone: has to be minimally 3 numeric characters.
- Password/Confirm: simply delete any entries and leave both blank.
- If there is an Address associated with this Tester, make sure the required fields all have some form of data. Typically the Country and Region/State are not set, preventing you from saving your edits.
- Once everything is done, click the Save (diskette) icon on the top right of page.