

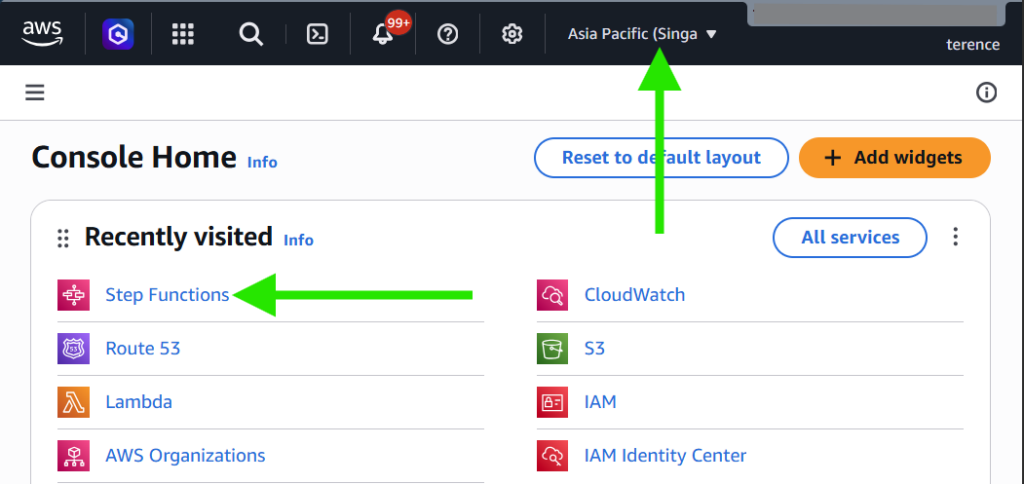
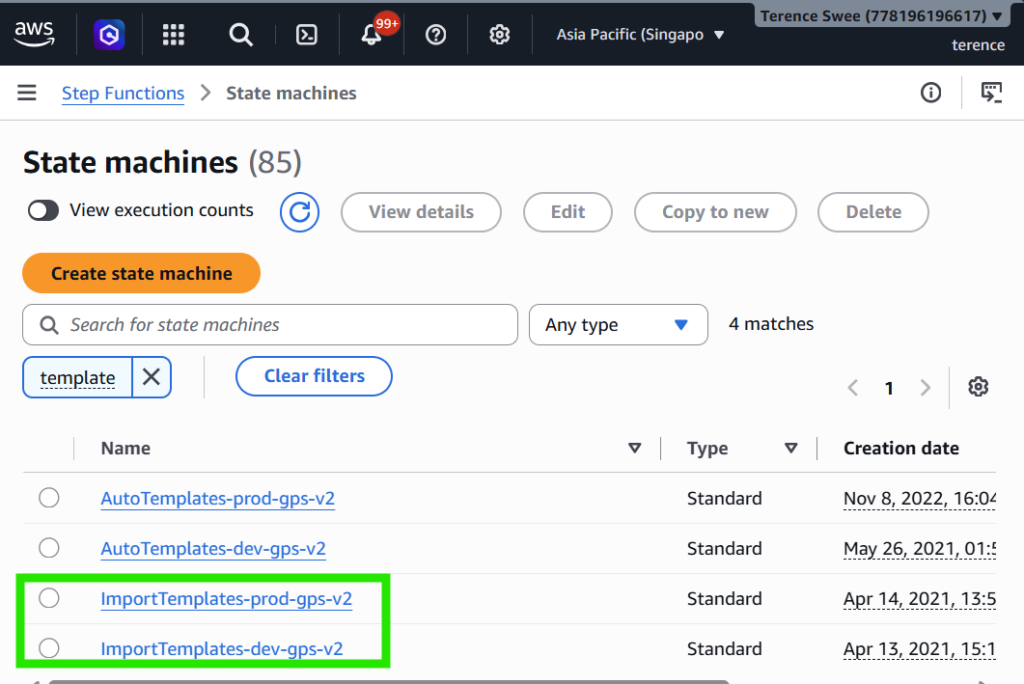
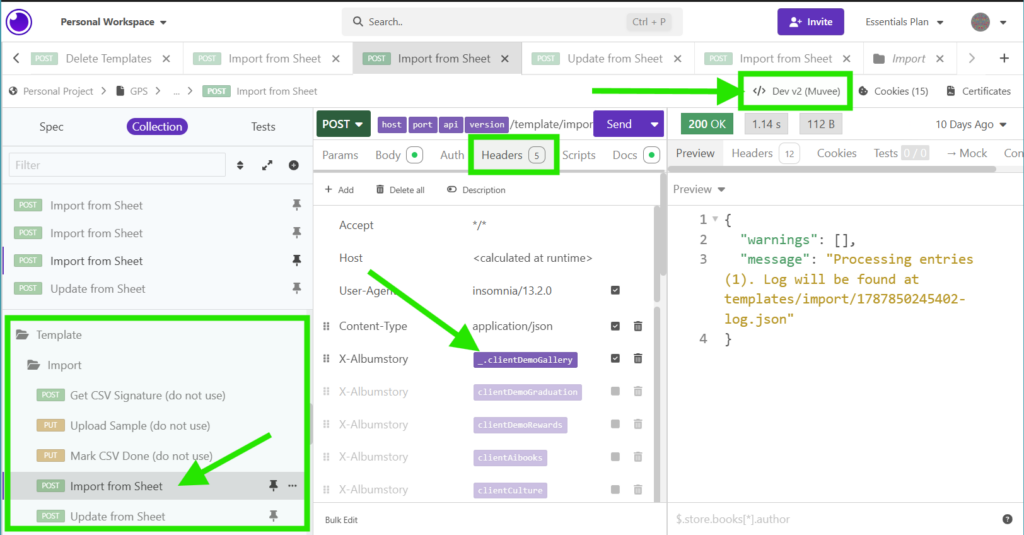






To monitor whether your template import was successful, and any error messages, do this:
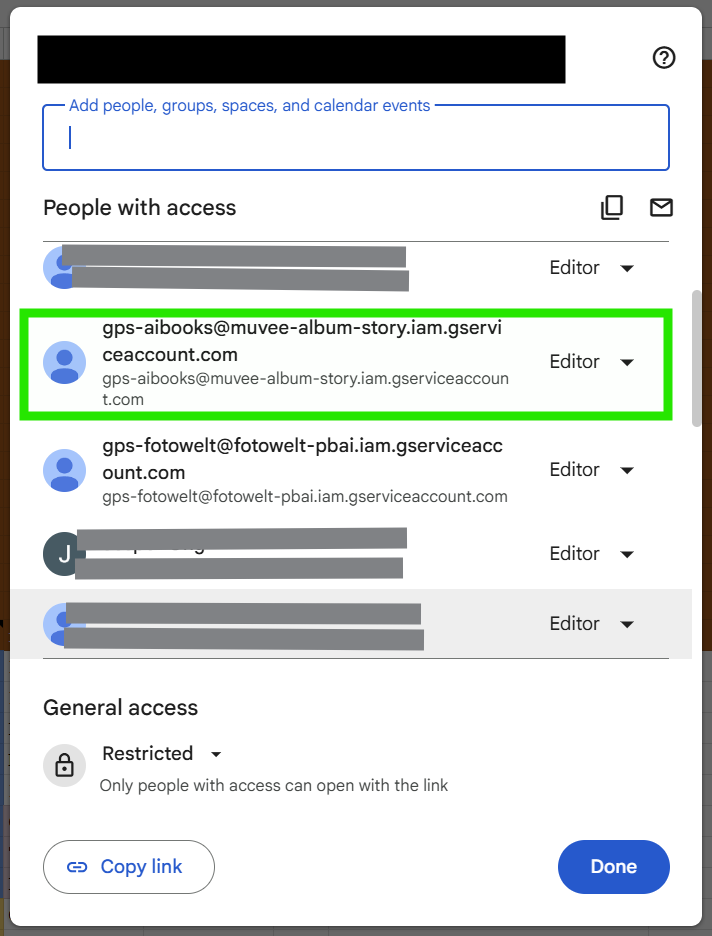
If you are reusing the spreadsheet of templates from Client A and trying to import to Client B, make sure that the sheet has been shared with the GPS-id for Client B also. To do this, go to Client B’s Official Configuration sheet and click Share. Copy the address which starts with GPS.
Then go to the Client A sheet, click Share and add this address as an Editor.
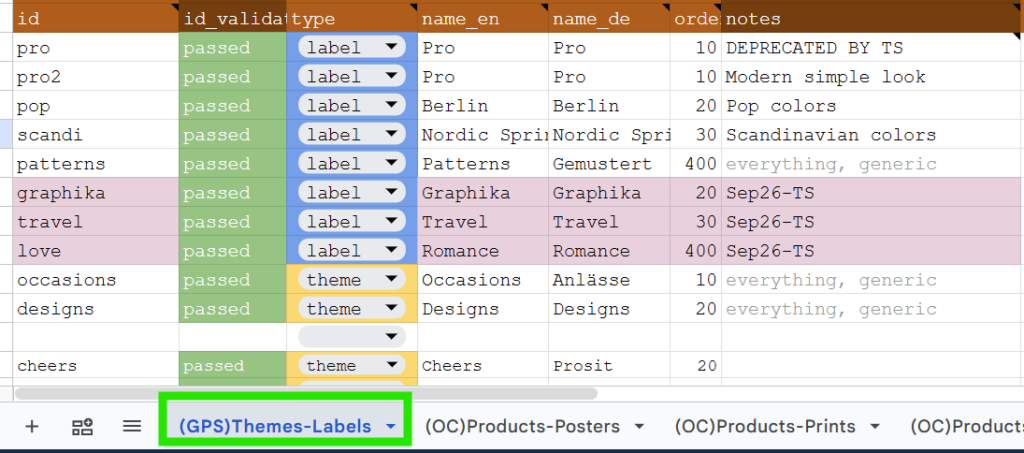
Each Template (regardless of Photobook templates or templates for other products) will belong to a “Label”.
This Label becomes the collection name (or template family) label which appears on the UI in both Native mobile and PWA.
Make sure you are indicate labels in your template worksheet which are recognized by the system. To do so, you have to ensure you have filled in the (GPS) Themes-Labels sheet, and then import them via Insomnia.
This assumes you are already set up properly on Insomnia to be able to access our APIs.
Checklist:
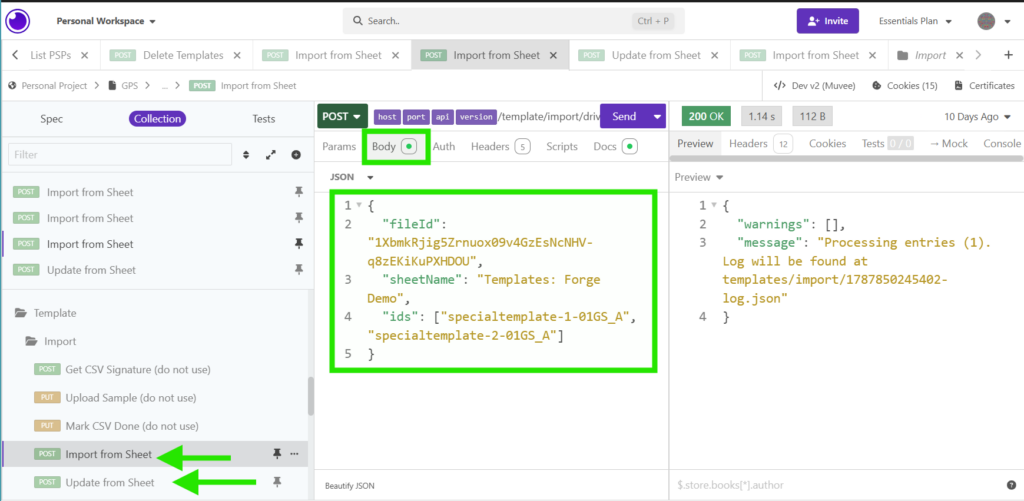
Now go to the Body, you should already see sample JSON written there.
Replace “fileId” with the Googlesheets URL snippet.
“Sheet Name” is the text label given to the tab in that sheet.
“ids” are optional. If not indicated, then it will import ALL the templates in that tab. If indicated, it will only import the indicated templates.
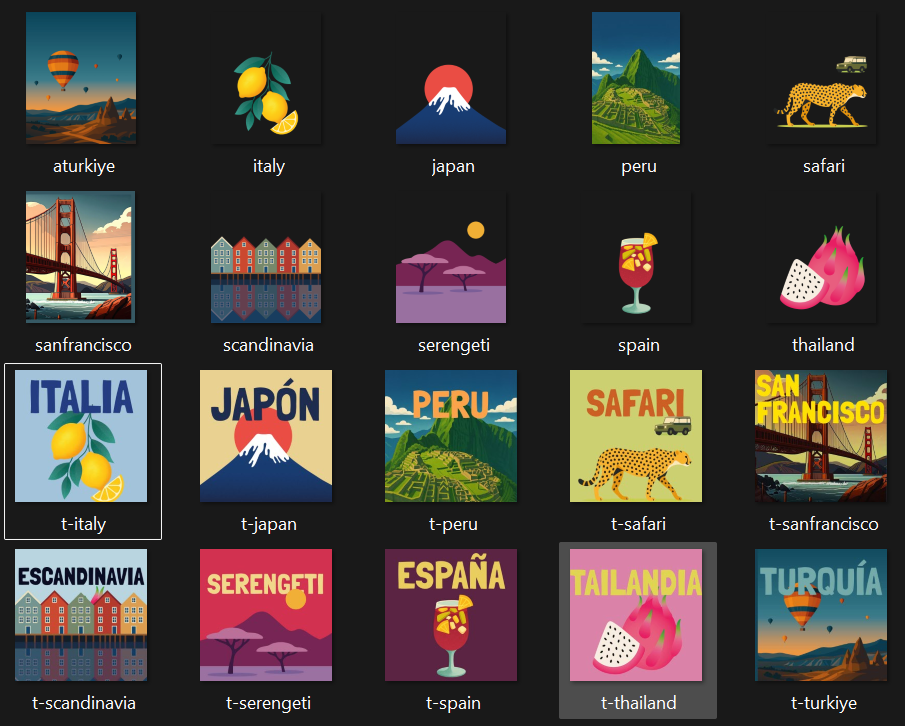
Thumbnails have to be PNG or JPG and square, typically 150px.
Note: if attribute:templateSelection is false, then you do not need to prepare a special thumbnail and can simply point it to any valid image file, since it will not show up in the UI.
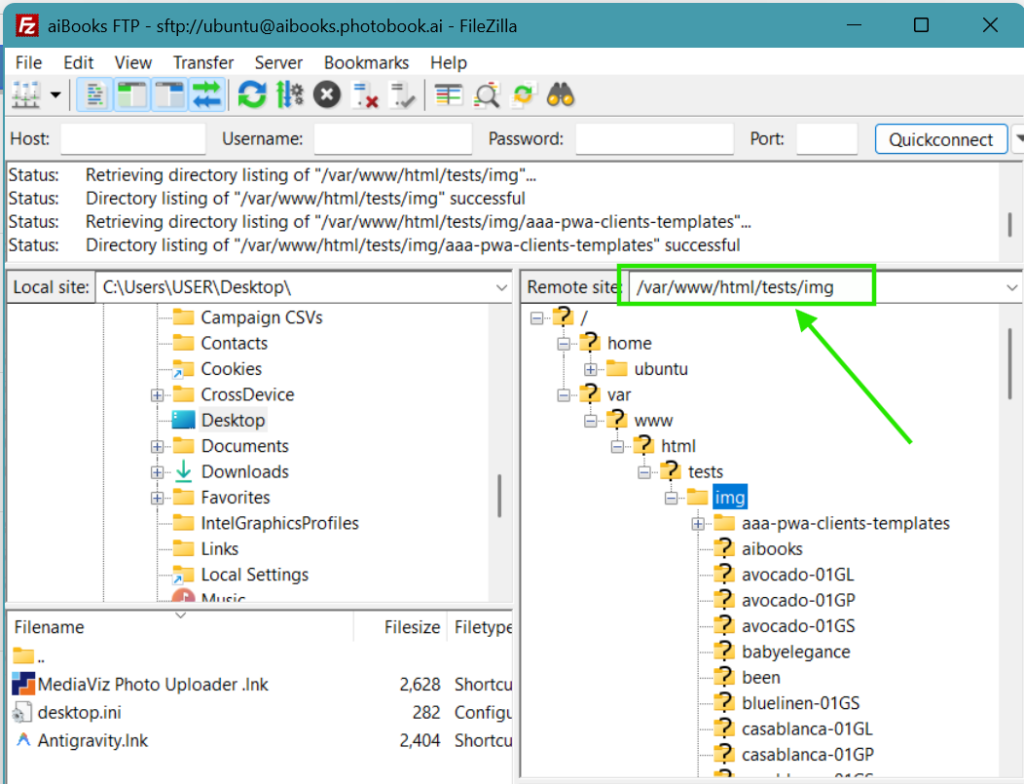
In the process of importing a Template, the system populates a DB with all the image assets. To be able to fetch these, they need to be in the cloud. We have provisioned a holding FTP site for such purposes. (these files can technically be anywhere so long as you are able to reference it with a URL).
Assuming you have the FTP credentials entrusted to you, place them in this directory:
/var/www/html/tests/img
Best Practice:
Create directory for all the templates for this client
Upload all the thumbnails and other graphical elements in the same folder, but giving them idiomatic names which makes sense to you months later.
Always start by giving your template a descriptive name (like “travel-flowers”)
Re-use this name by using the =concatenate(“template-name”,”.png”) function in googlesheets.
Strategically use “t-” and “bg-” or “linen” prefixes to your filenames to denote the Thumbnail, Background, Cover, or simply to differentiate between (say) a color series for Linen versus, Canvas materials.
If the coverAsset is for a Portrait book, then add a “-P” to the name. “-L” for landscape, and “-S” for Square.
This makes it much easier to set up 20-30 templates which reuses largely the same dimensions, differing only in the cover asset filename or even, just a cover_background color.
When you prepare the coverAssets for PWA/Web, you can markup each graphical element on its own line, each with its own anchoring, so that it is easier to morph them for different book sizes without having to return to Figma/Photoshop to render a new asset.

In this example, we have two independent “stickers” which you can anchor W2 for the strap, and C12 for the round badge to achieve the template below it.
So by simply changing the XYWH values, you are able to re-use the same elements for a landscape and portrait sized book cover like this below:
The Native Mobile App implementation of photobook cover templates only supports having a single coverAsset. This means all elements have to be flattened into a single PNG.
This simplifies the asset’s markup in the template sheet, but limits its versatility when transforming for various different sizes and aspect ratio books.
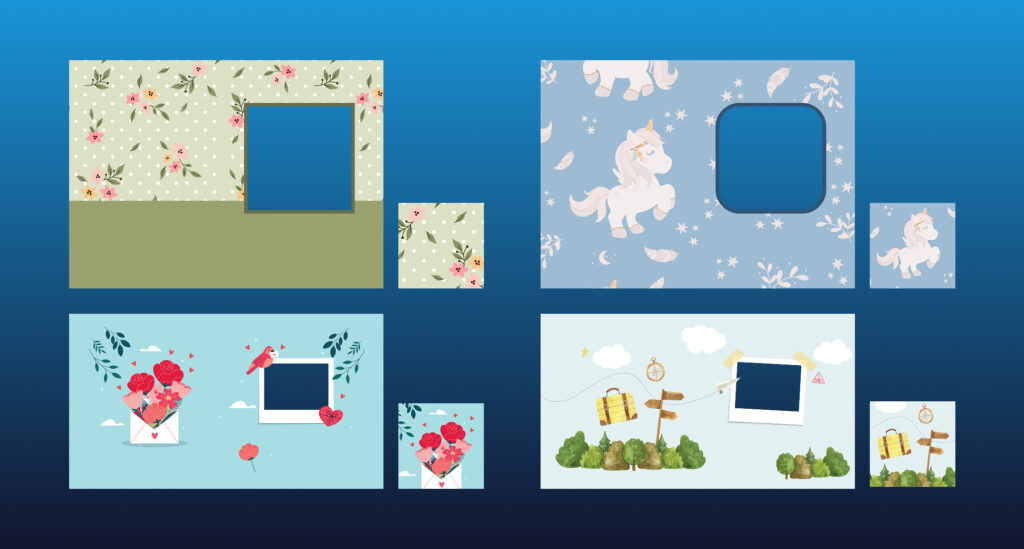
In this example, 2 flattened coverAssets have to be prepared.
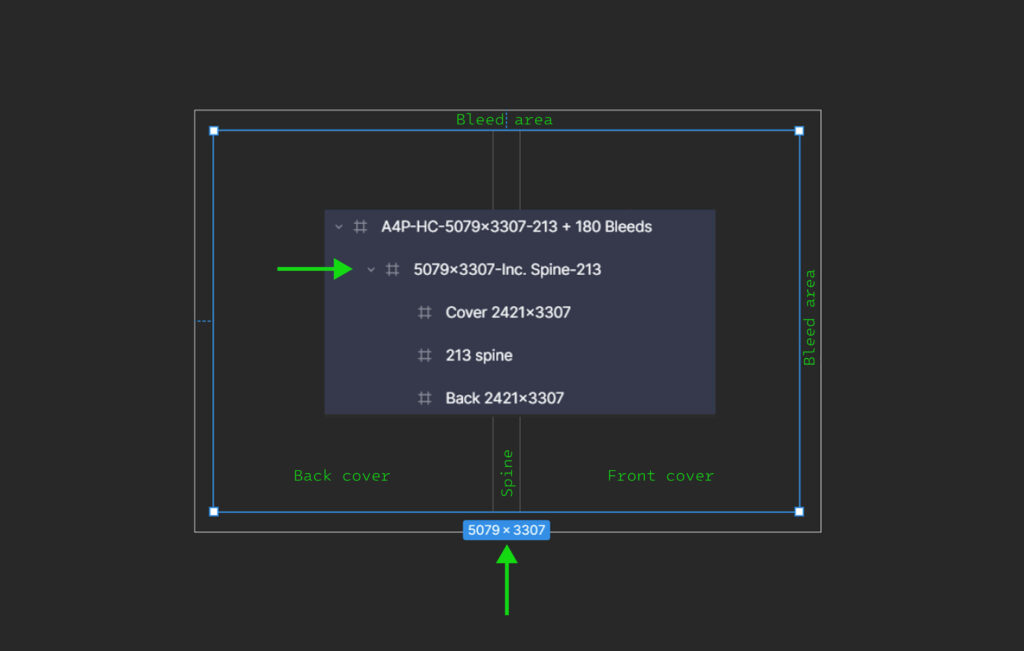
Set up individual frames for the Cover, Back and Spine. Line them up, and then Frame them again. Name this frame with the outer dimensions (W x H). These 2 numbers are what you need to normalize the coordinates of your XYWH of each element in your surface (Cover or Page).
It is optional to make a larger frame (larger by the bleed required by the PSP) .
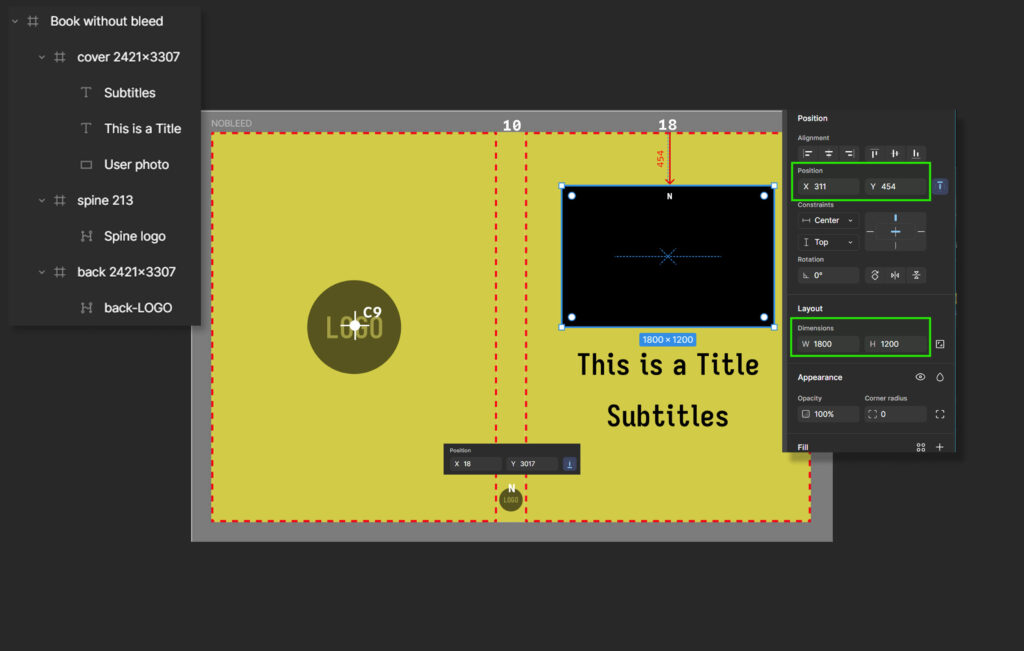
If you place your assets in the respective frame, you can then easily read off the X and Y location without needing to do additional math.
Photo: If you place coverPhoto inside the front cover frame and anchor to N18. Then the X, Y position inside Figma of your coverPhoto, corresponds to the location of the NW corner of your photo, with respect to the Anchor 17 of the Cover. If you want to center the photo horizontally, click the Centering icon. And if you anchor to 18, then you only need the Y value offset.
Similarly a logo can be placed at C9 and you only need the W and H values, since XY offsets will be 0.
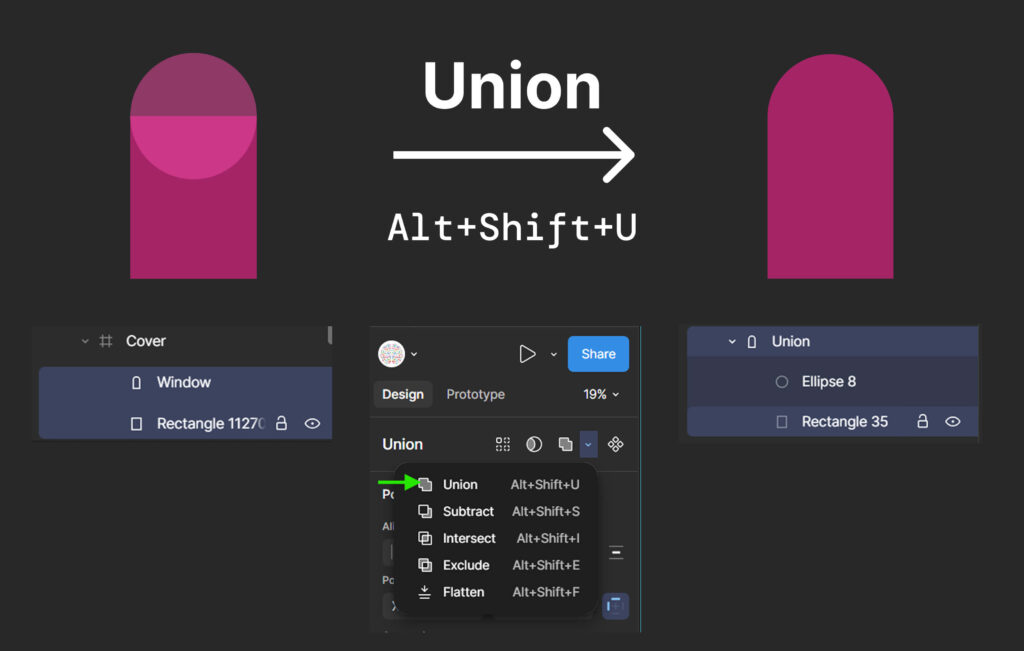
Step 1: create separate components of that irregular shape using polygons (triangles), rectangles and circles.
Step 2: place each one above each other in layers (left panel) [Ctrl G] to group them quickly.
Step 3: Highlight all layers of the individual objects which make your shape, then go to layers (top-right) and select Union. [ Alt+Shift+U ]
Step 4 (optional): To completely fuse them into a single vector, right-click and choose Flatten
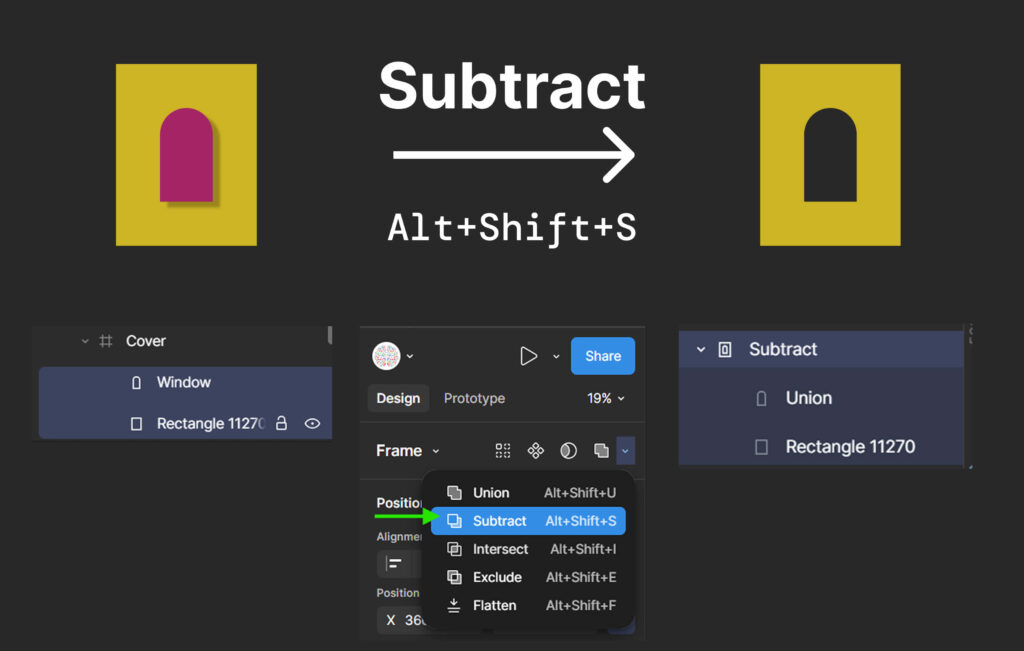
Step 1: create a shape of that window
Step 2: place it one layer above the background image (this can be a stock art texture, png or simply a rectangle filled with the color or gradient you want)
Step 3: Highlight both layers on the left panel, then go to Layers (top right corner) and select Subtract. [ Alt+Shift+S ]
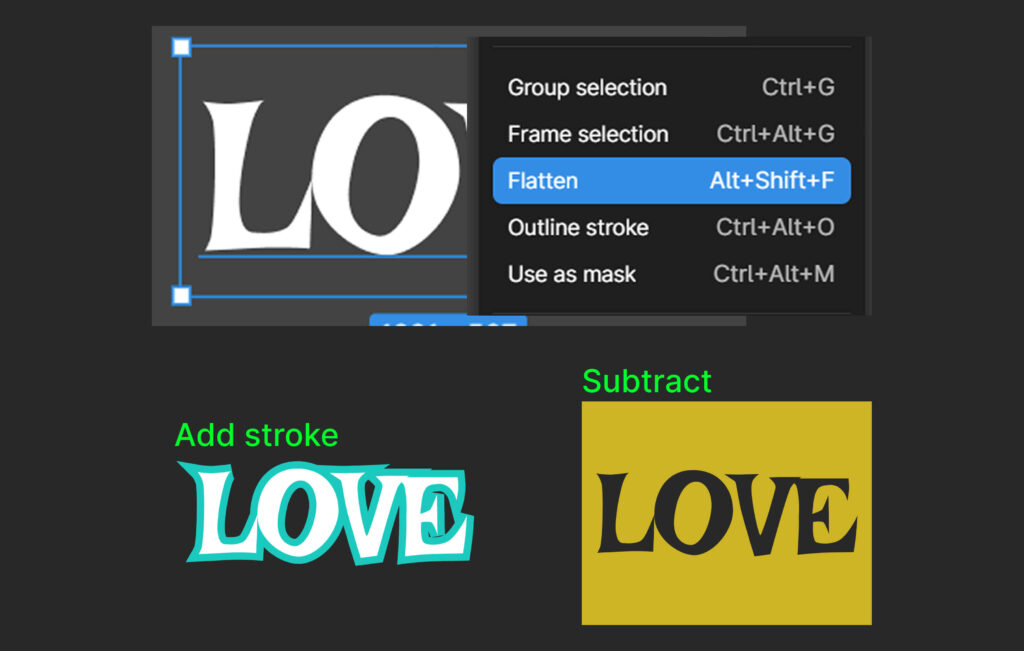
Step 1: Create a text box and choose the font you want (size doesn’t matter as they will become vectors), then type the word.
Step 2: Highlight entire word, right-click–> Flatten
Bonus: Now that you have a vector, you can add a stroke (outline) around each character.
Bonus 2: You can also use the Subtract method above to create a cut-out in that shape on your cover.
photobook.ai uses AI to automatically create photobooks and other printable products. We provide white-labelled native mobile and progressive web apps to ecommerce and print suppliers. Through our network, we fulfill print products globally for clients who want to produce closest to their customers to reduce their carbon footprint and yet be competitive in their offering.